
How to use this page
- Work through Tasks 1–4 and tick each step as you complete it. Your progress and answers are saved in this browser automatically.
- Wherever you see
 Screenshot, capture your lab progress and attach the screenshot right on this page. Add a short explanation for each.
 - Answer the Task 5 questions, then use Print / Save as PDF to export your answers and screenshots as one submission file.
- Remember to delete your lab resources after capturing everything.
Lab Objectives and Architecture reference
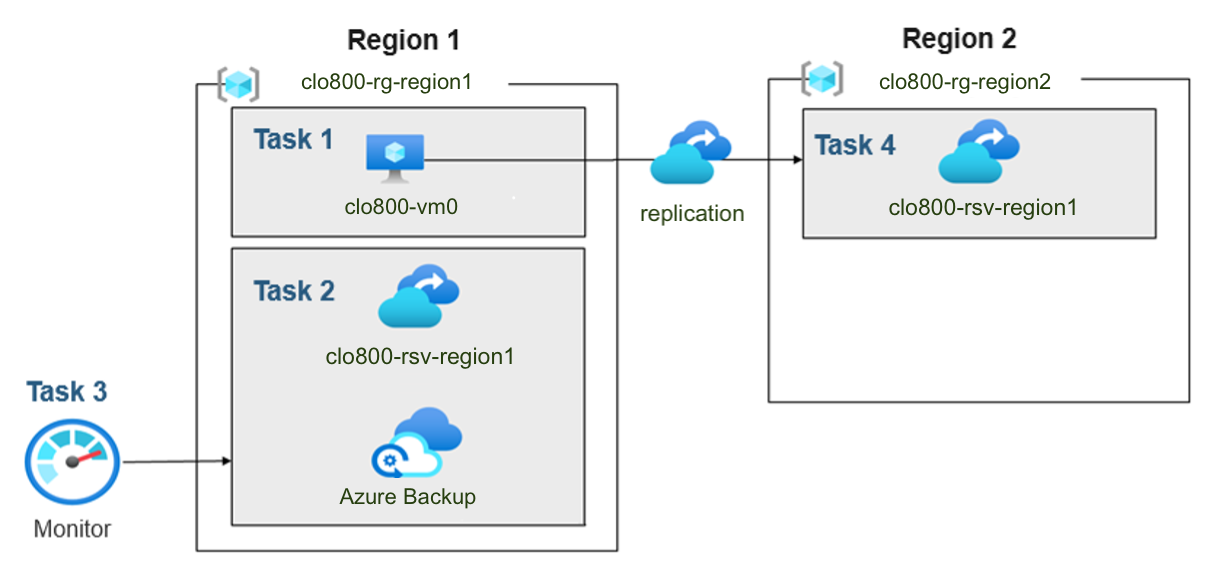
Lab scenario: Your organization is evaluating how to backup and restore Azure virtual machines from accidental or malicious data loss. Additionally, the organization wants to explore using Azure Site Recovery for disaster recovery scenarios.
In this lab, you will:
- Task 1 — Use a template to provision an infrastructure. 20 pts
- Task 2 — Create and configure a Recovery Services vault and configure a vm-level backup. 20 pts
- Task 3 — Monitor Azure Backup. 15 pts
- Task 4 — Enable virtual machine replication. 25 pts
- Task 5 — Summary questions & review. 20 pts
You will deploy and protect this infrastructure across Tasks 1–4.
Task 1: Use a template to provision an infrastructure 20 pts
In this task, you will use a template to deploy a virtual machine. The virtual machine will be used to test different backup scenarios.
-
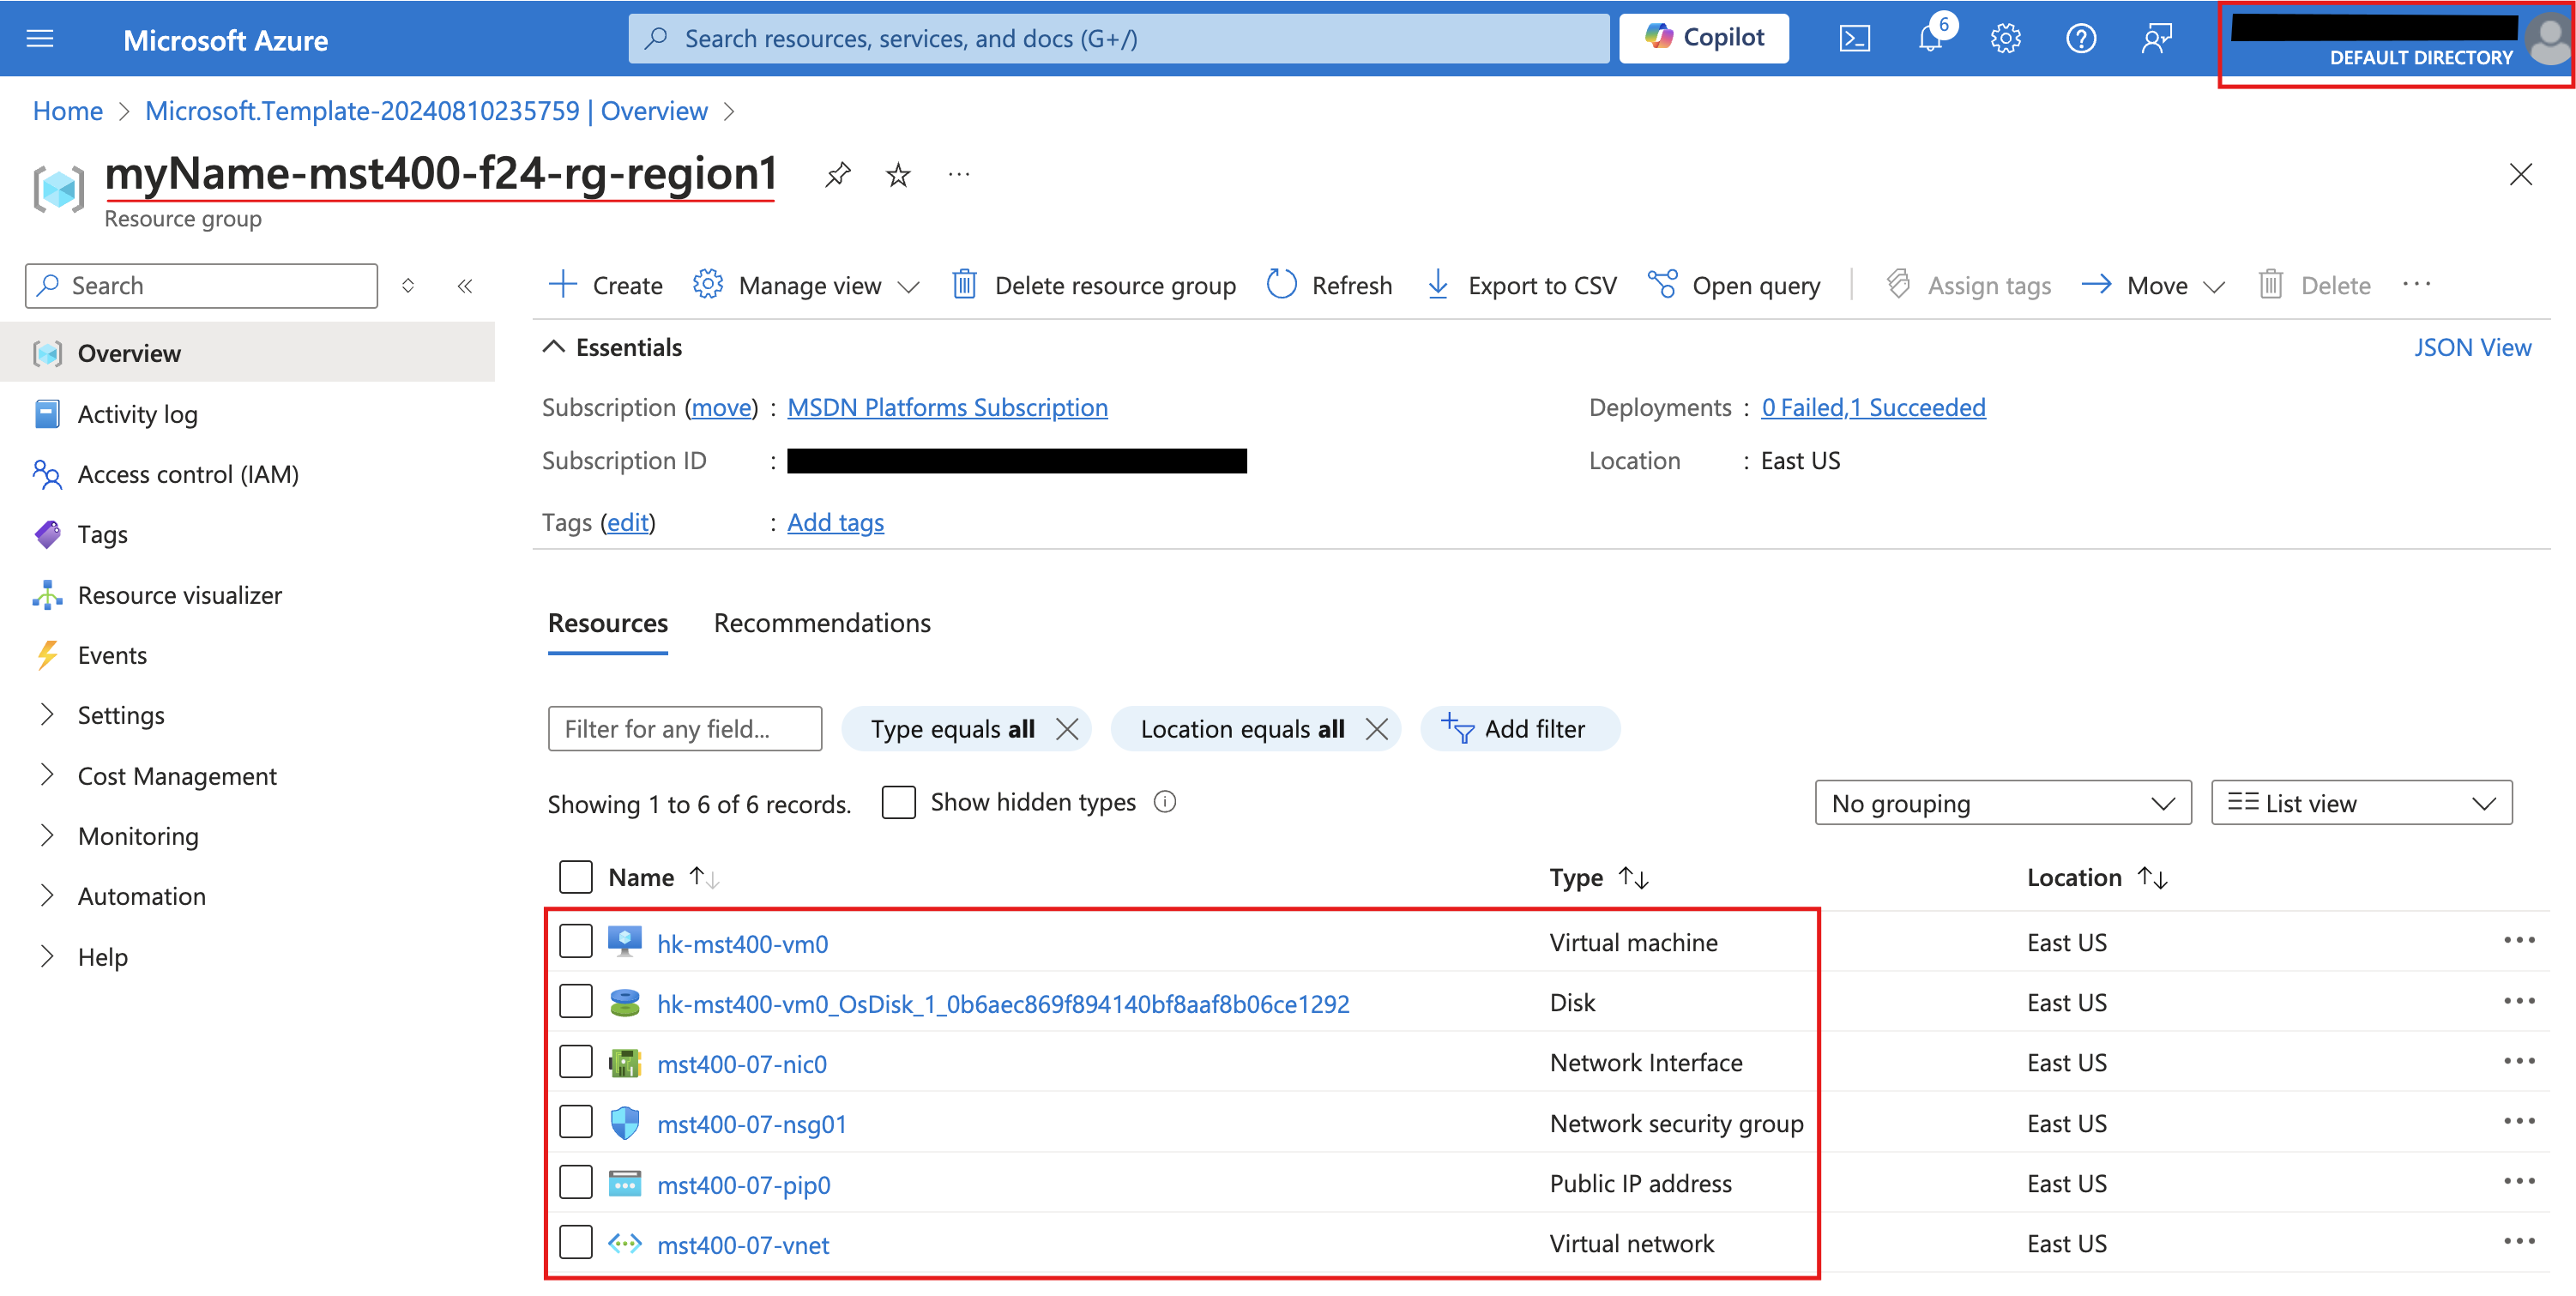
Setting Value Subscription Your Azure subscription Resource group <yourName>-clo800-F67-rg-region1Region East US Username localadminPassword Provide a complex password Vm Name Prefix <your initials>-clo800-vm(i.e. hk-clo800-vm) - Screenshot must show your Odl_user account, the deployed <your initials>-clo800-vm0 virtual machine and its virtual network after selecting Go to resource
Task 2: Create and configure a Recovery Services vault and configure a VM-level backup 20 pts
First, you will create a Recovery Services vault. A Recovery Services vault provides storage for the virtual machine data.
-
Settings Value Subscription the name of your Azure subscription Resource group <yourName>-clo800-F67-rg-region1Vault Name <yourName>-clo800-F67-rsv-region1Region East US
Implement a VM-level backup
Now, you will implement Azure virtual-machine level backup. As part of a VM backup, you will need to define the backup and retention policy that applies to the backup. Different VMs can have different backup and retention policies assigned to them.
-
Settings Value Where is your workload running? Azure (notice your other options) What do you want to backup? Virtual machine (notice your other options) -
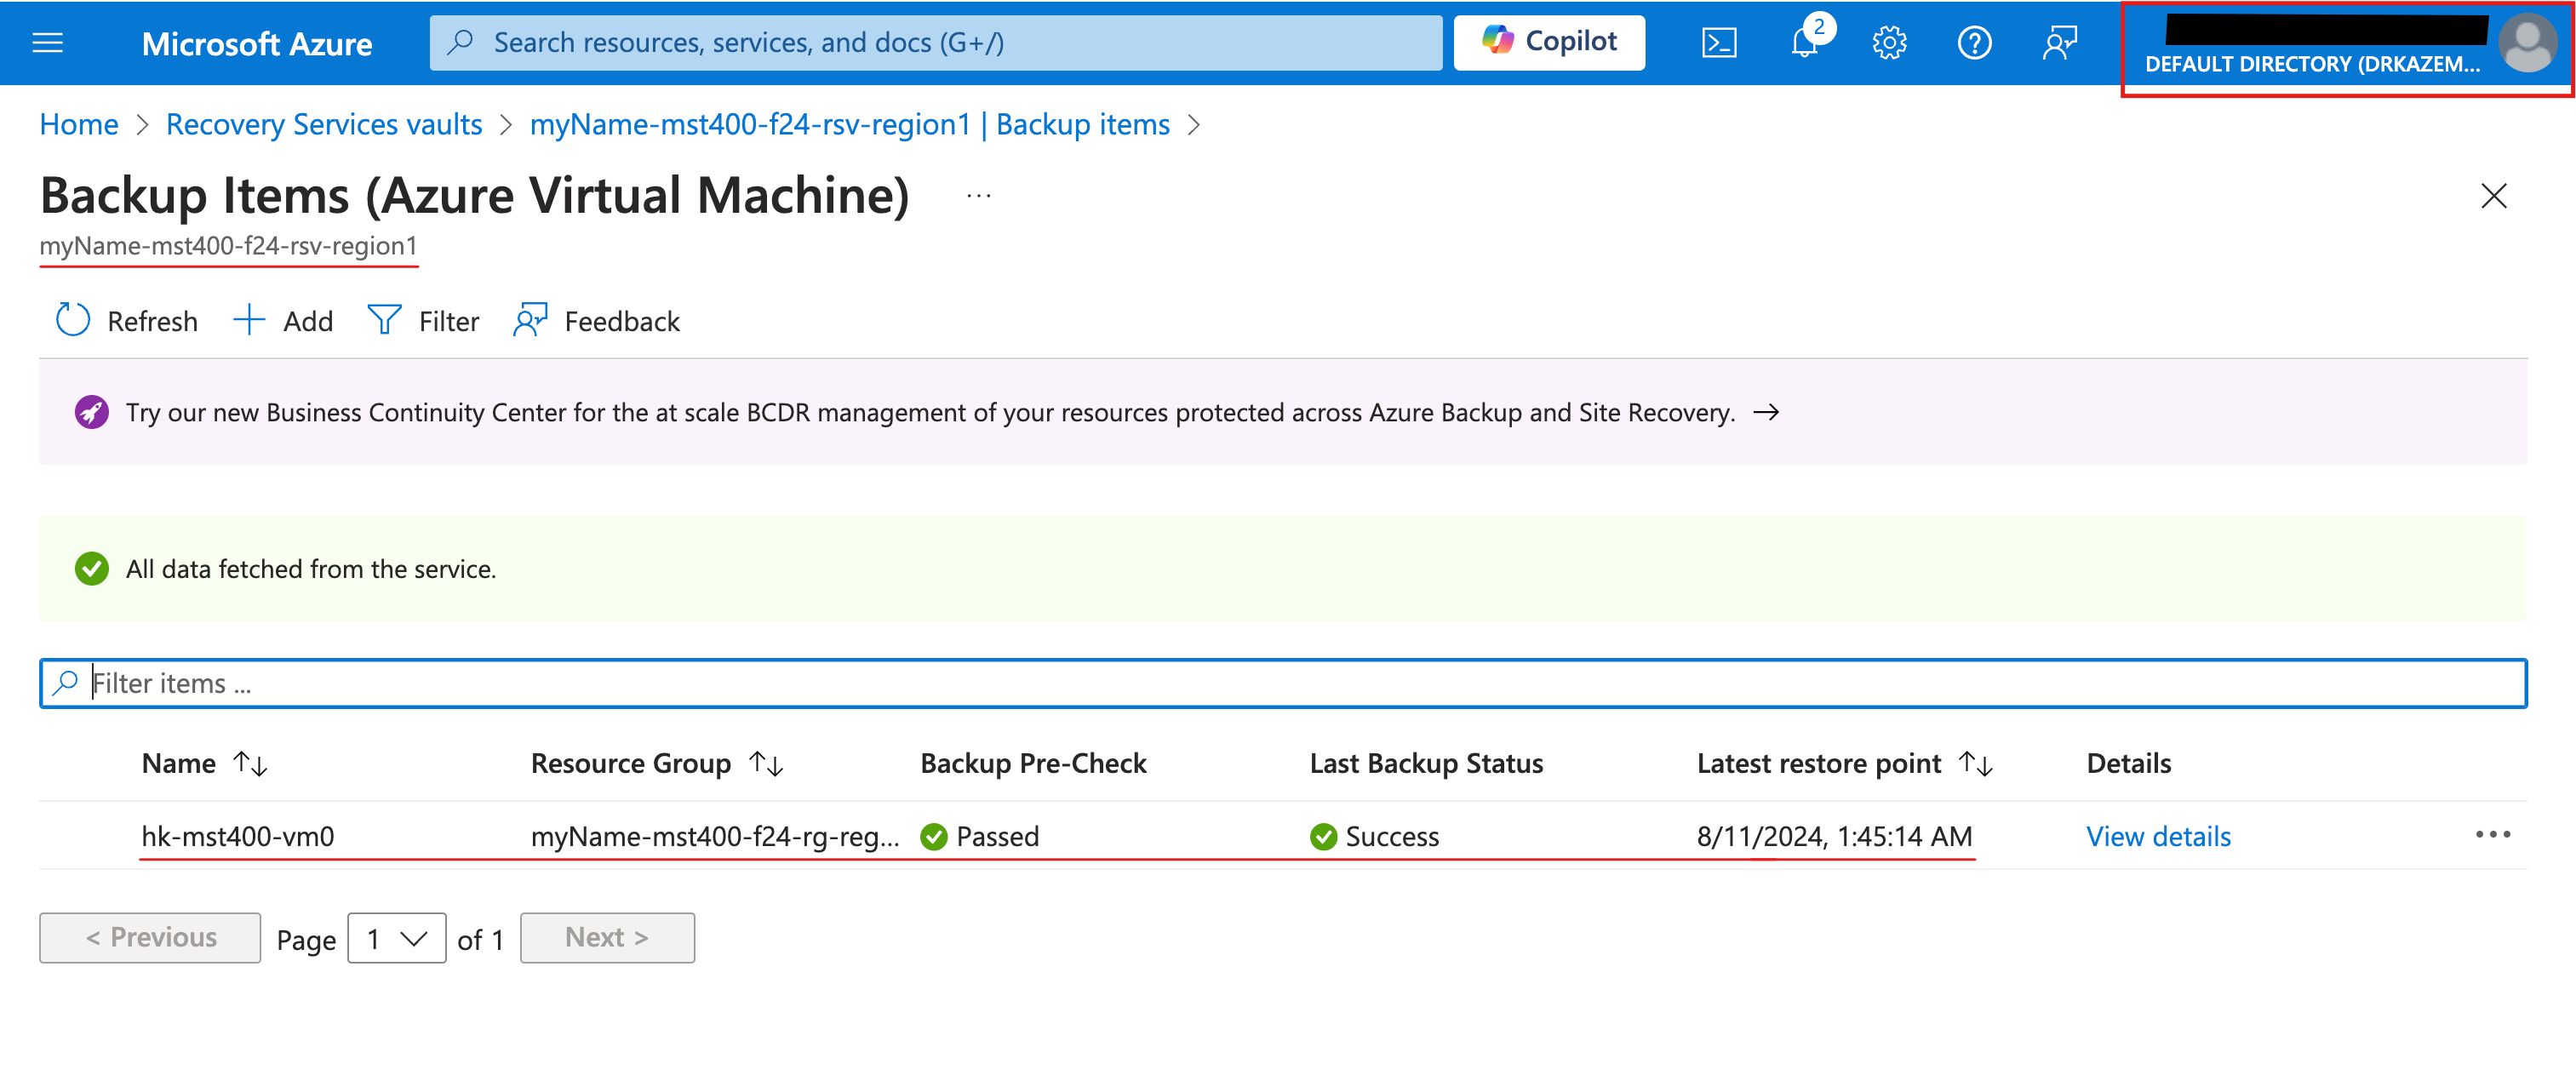
Setting Value Policy name <yourName>-clo800-F67-backupFrequency Daily Time 12:00 AM Timezone Eastern Time (US & Canada) Retain instant recovery snapshot(s) for 2 Days(s) - Screenshot must show your Odl_user account, the Backup now action and backup job started for <your initials>-clo800-vm0
Task 3: Monitor Azure Backup 15 pts
In this task, you will deploy an Azure storage account. Then you will configure the vault to send the logs and metrics to the storage account. This repository can then be used with Log Analytics or other third-party monitoring solutions.
-
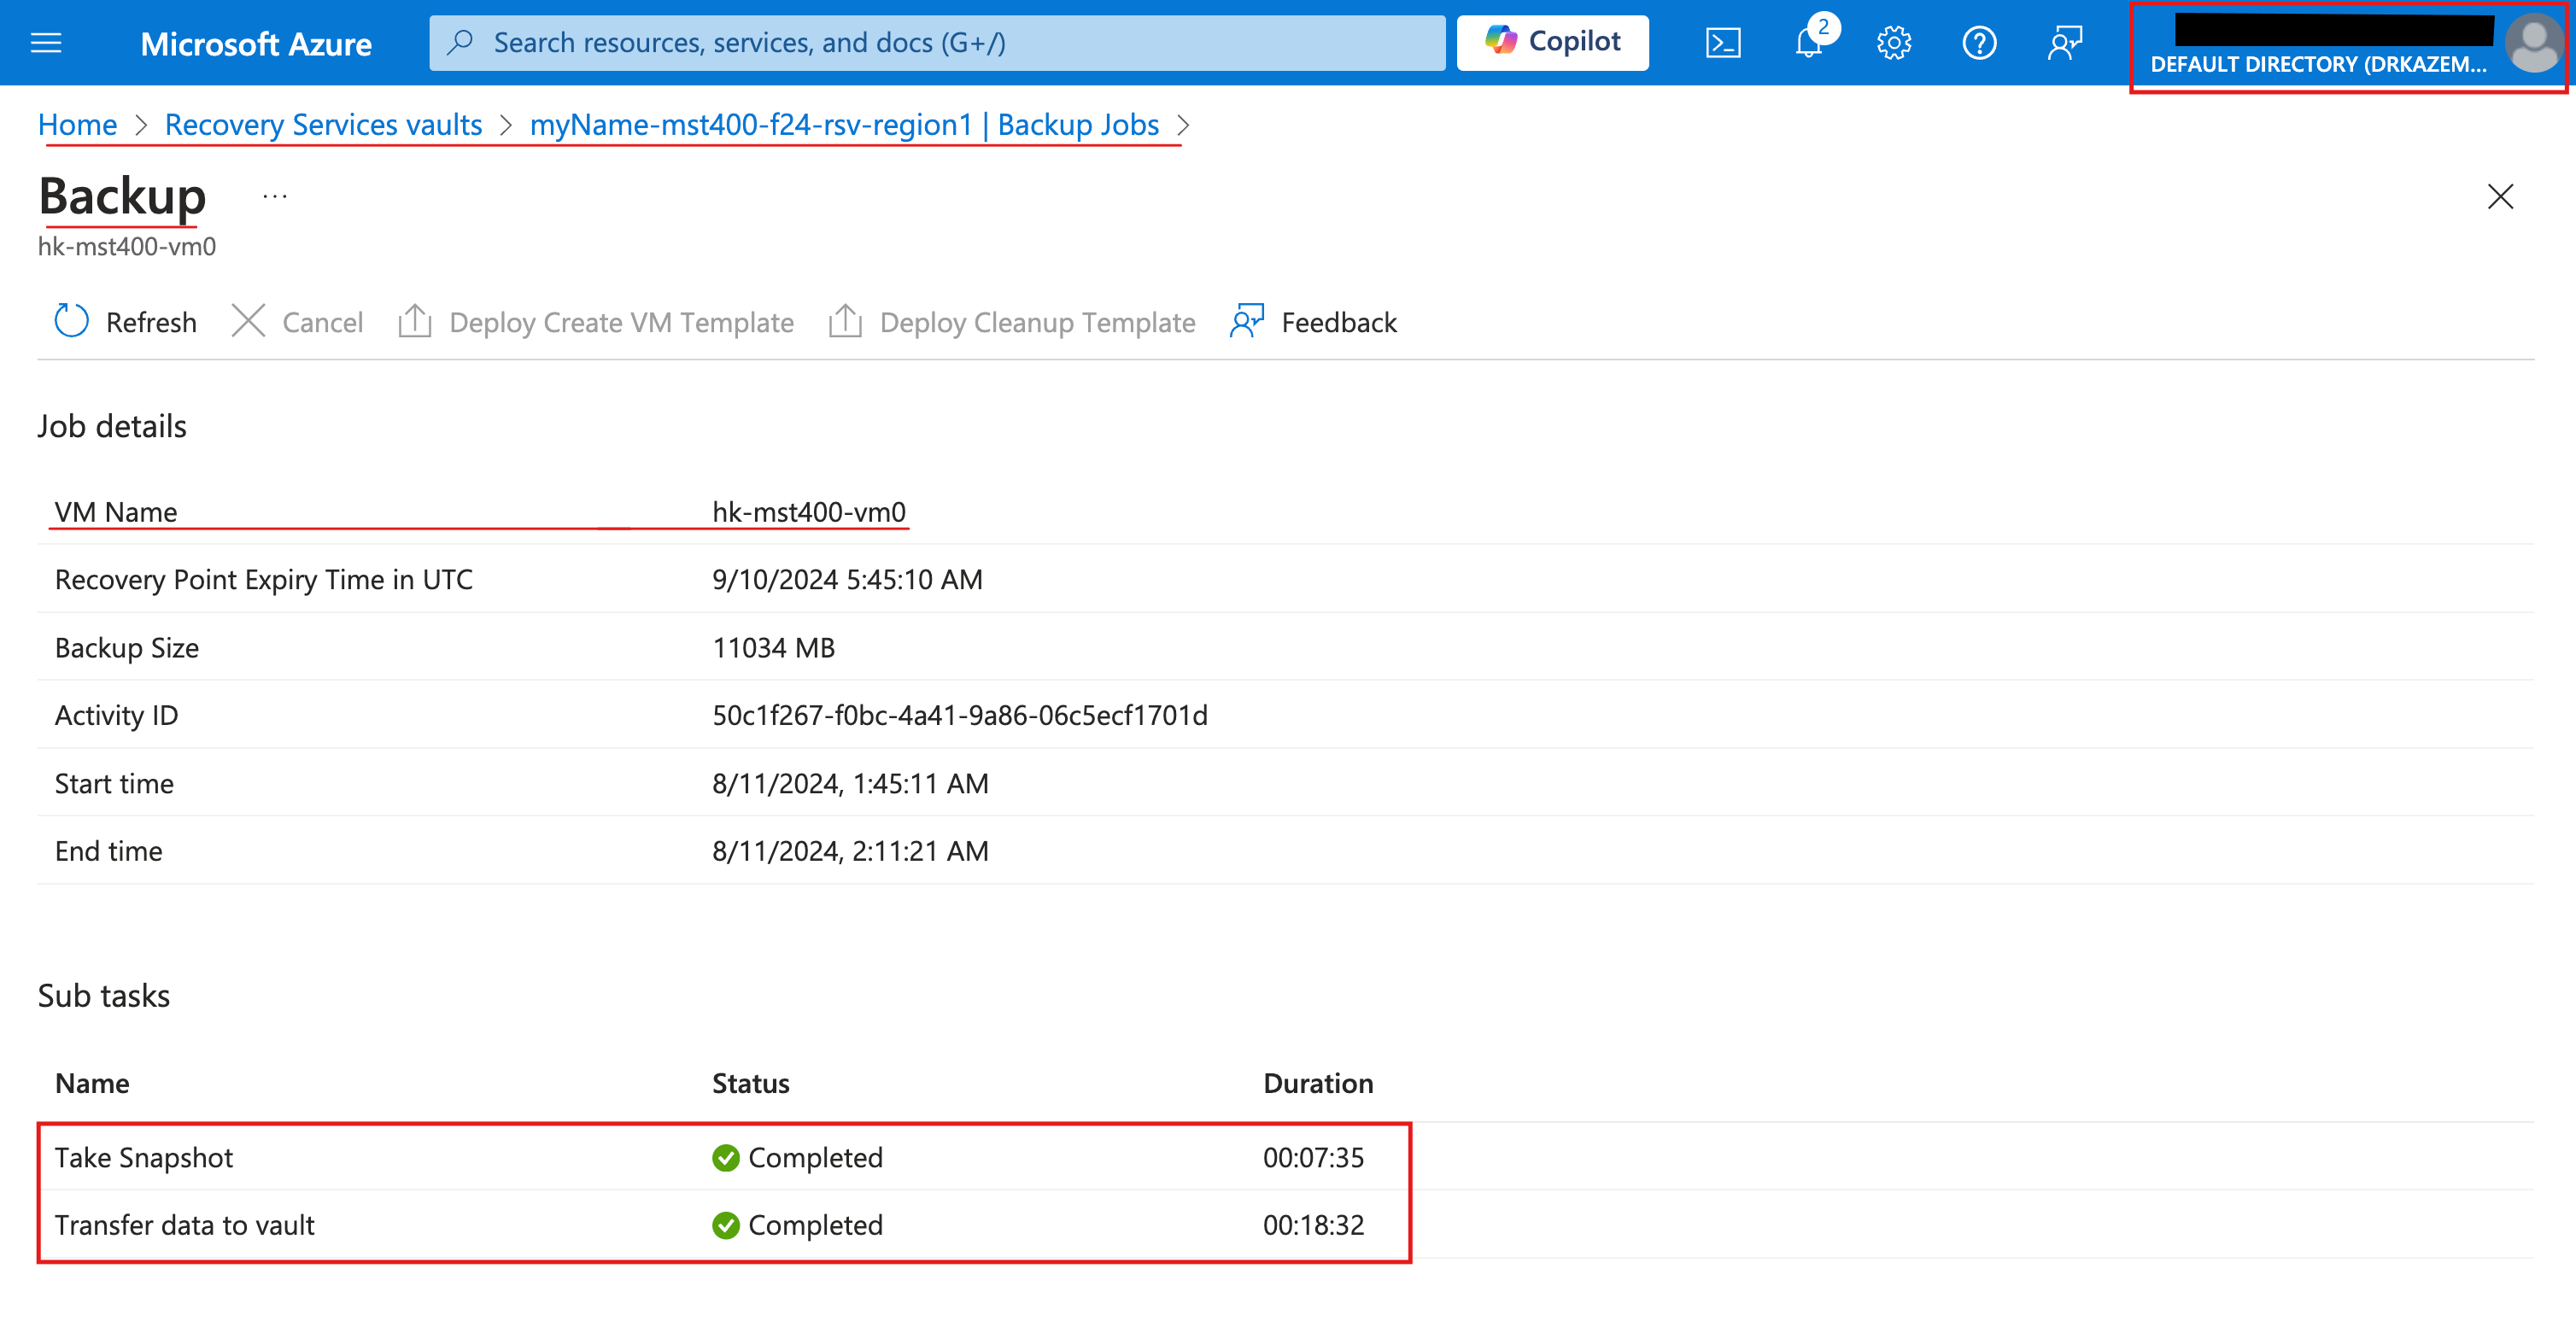
Settings Value Subscription Your subscription Resource group <yourName>-clo800-F67-rg-region1Storage account name Provide a globally unique name. (i.e. yournamemst400sa) Region East US - Screenshot must show your Odl_user account, the backup job details for <your initials>-clo800-vm0
Task 4: Enable virtual machine replication 25 pts
-
Settings Value Subscription the name of your Azure subscription Resource group <yourName>-clo800-F67-rg-region2(If necessary, select Create new)Vault Name <yourName>-clo800-F67-rsv-region2Region West US -
Setting Value Churn for the vm Normal churn Cache storage account (new) xxx It is important that both of these settings be populated, or the validation will fail. If values are not present, try refreshing the page. If that doesn't work, create an empty storage account and then return to this page.
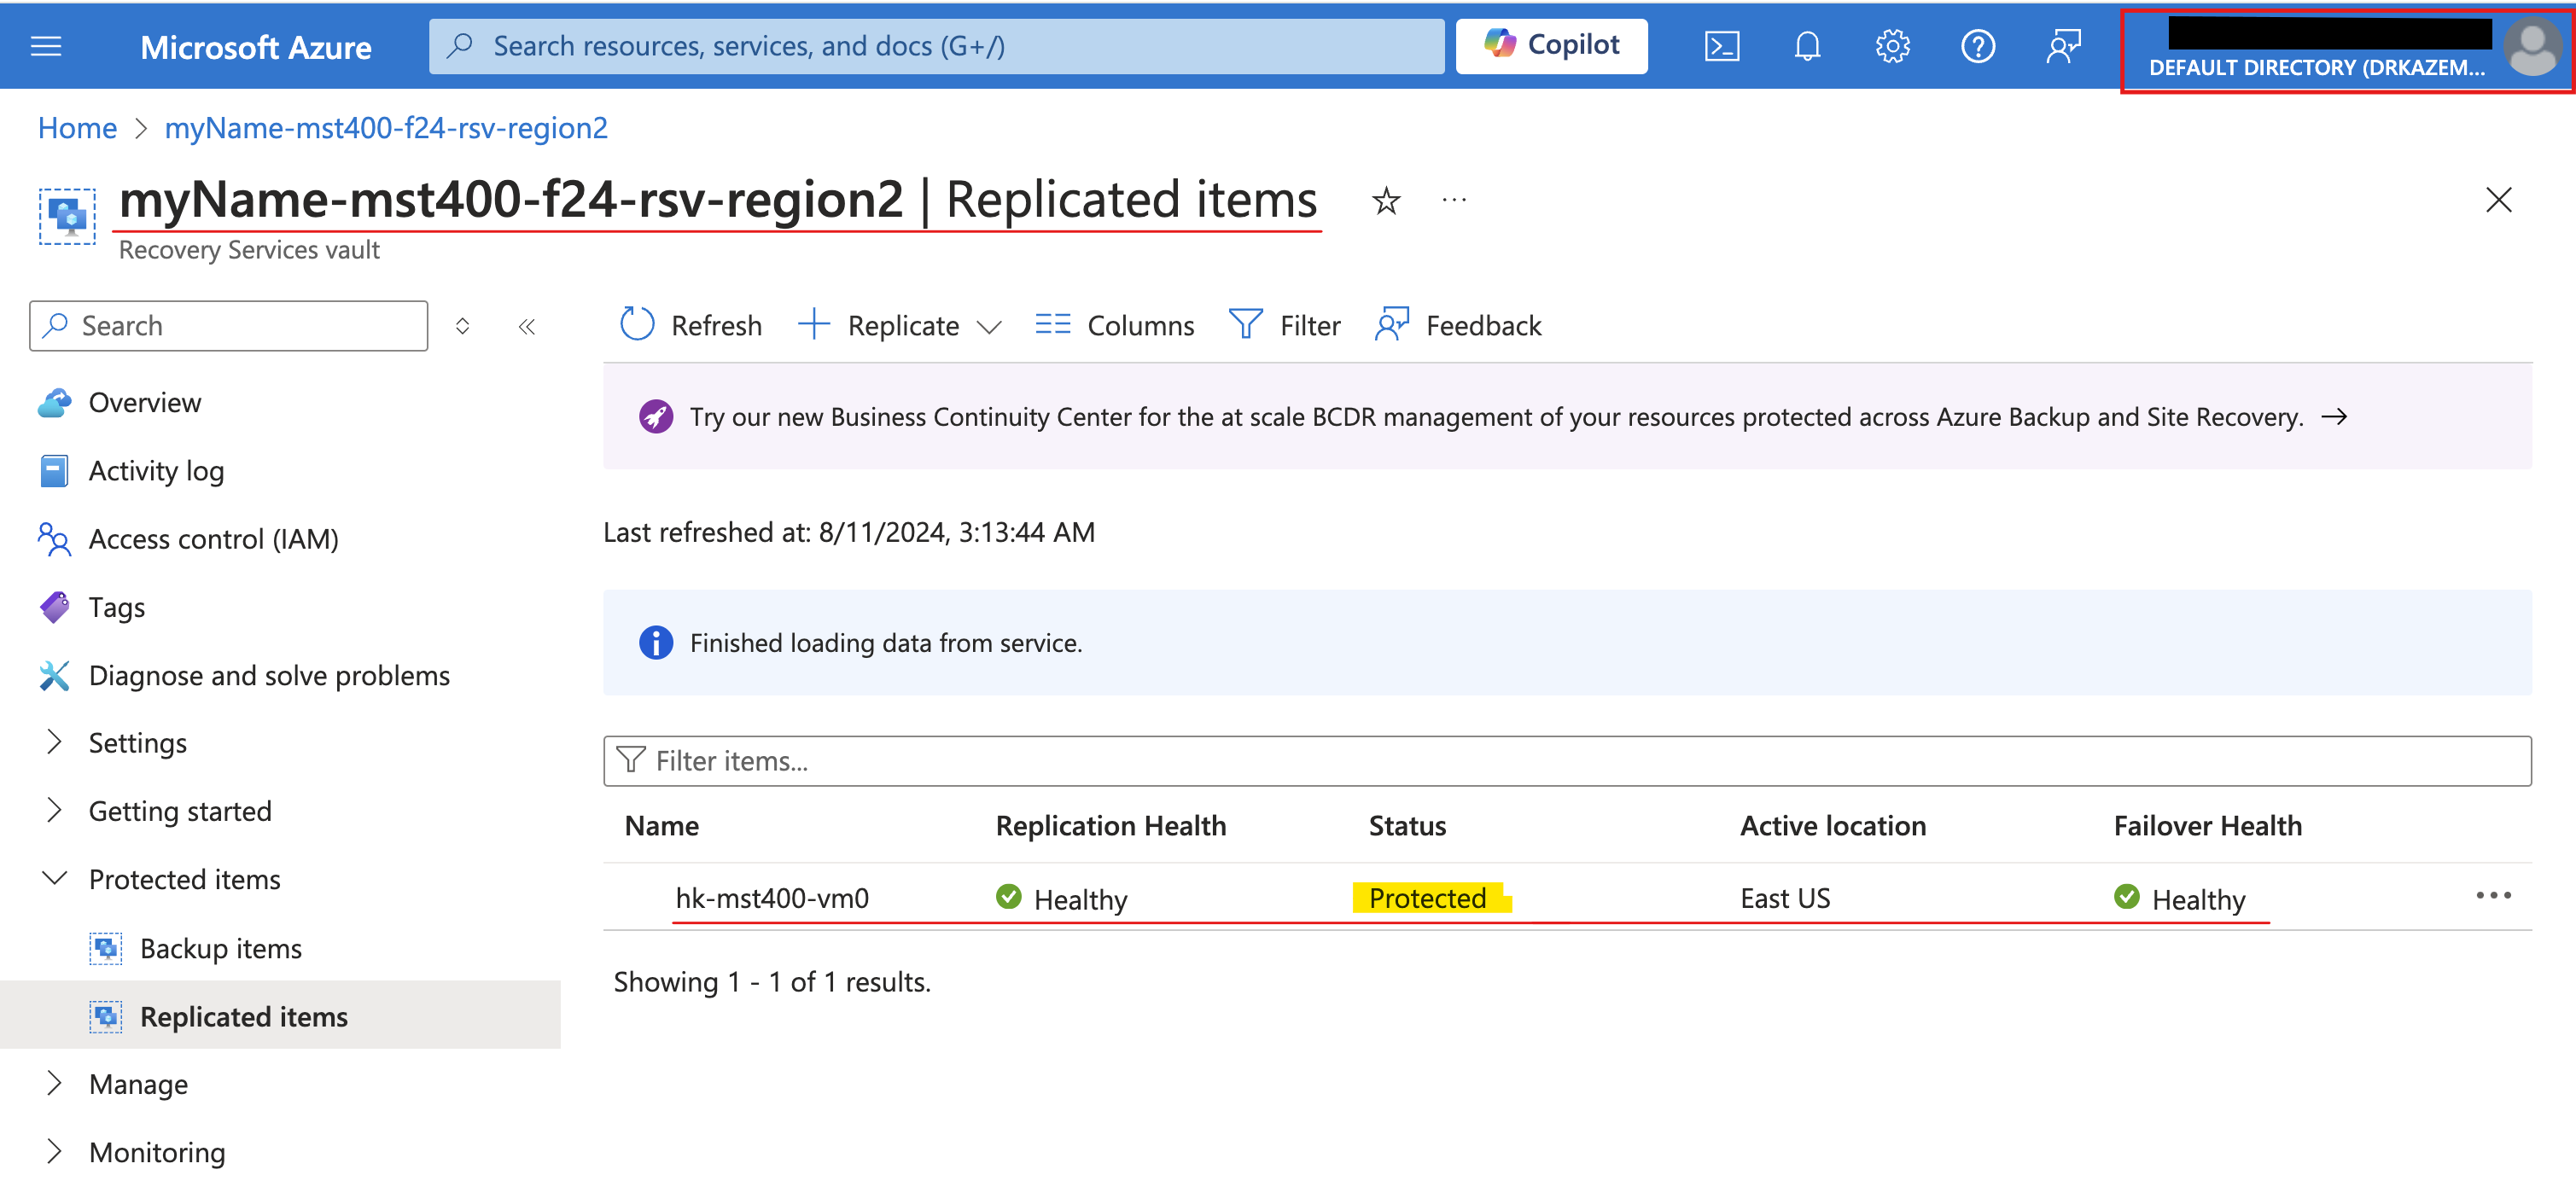
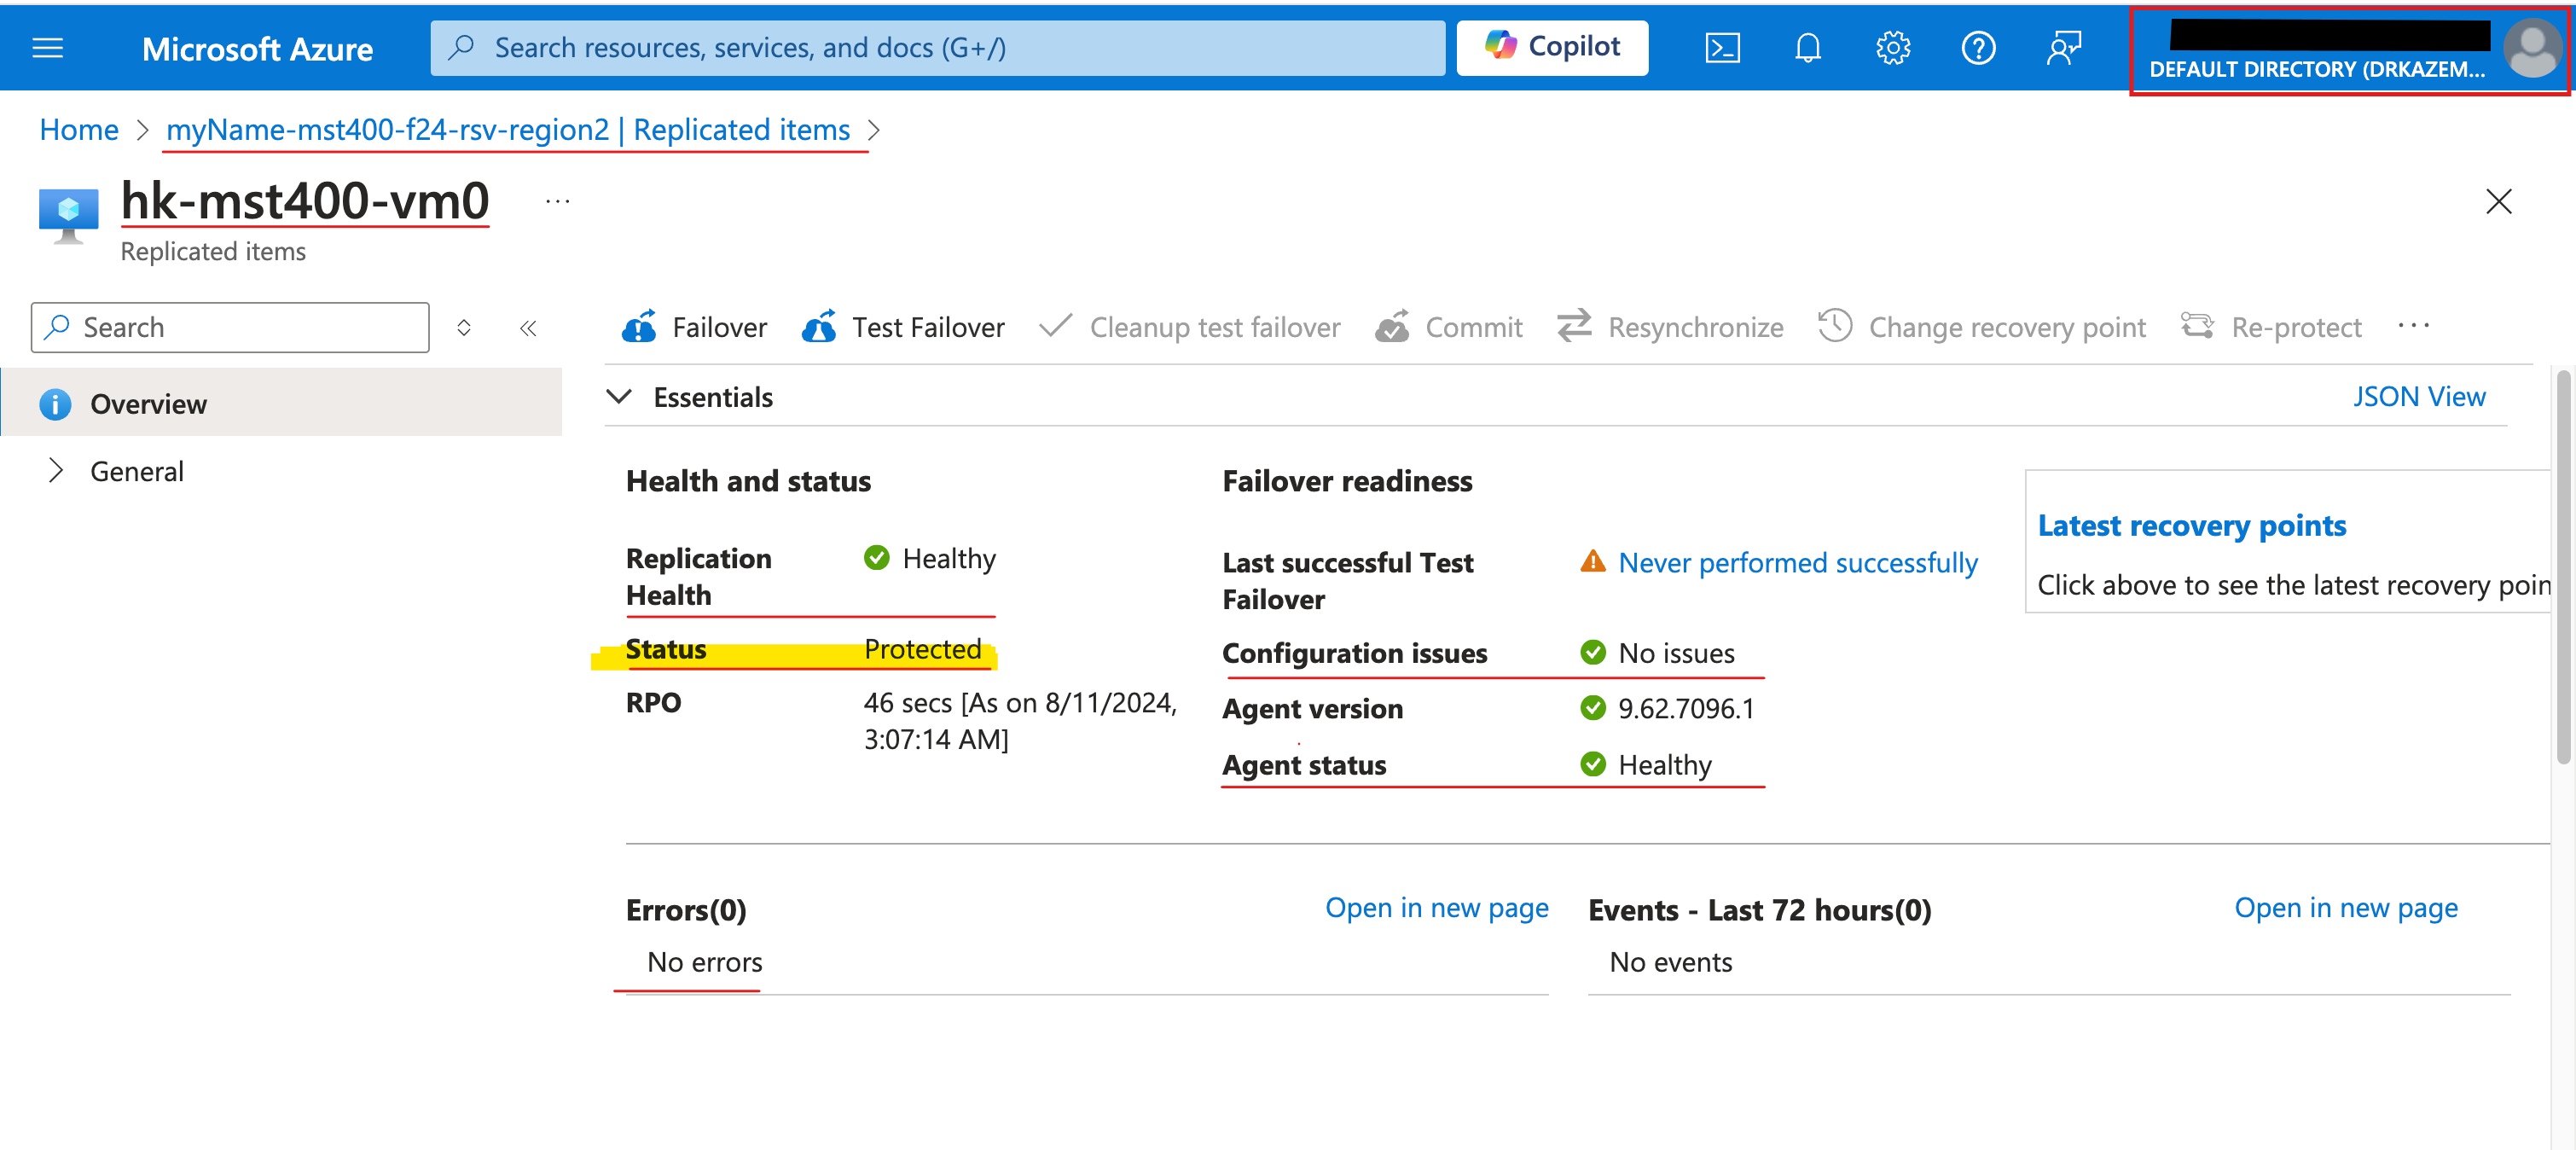
- Screenshot must show your Odl_user account, the replicated virtual machine with Healthy replication health (Protected status)
Task 5: Summary Questions & Review 20 pts
Minimum 2-3 sentences each — original thinking, your own words!
Sample screenshots reference
These are samples only. Your screenshots may vary, but they should include similar details.
Clean your resources
Remember to delete any Azure resources created for this lab after capturing all your information and screenshots. Removing unused resources ensures you will not incur unexpected charges and helps you manage your Azure credit for the course.
Since you created a backup in the lab and soft delete is enabled, simply deleting your resource groups will not delete your Recovery Services Vault (RSV). You must delete the backups and the RSV before deleting the resource groups. To delete a vault:
- Go to the vault Overview
- Click Delete
- Select "Delete using PowerShell script"
- Generate the script
- Run it in the Cloud Shell environment
- After successful completion of the script, you can delete your Resource Groups created for the lab as you normally would. Delete all resource groups except the Odl-Seneca-lab default resource group.
Your submission preview
Screenshots you attach above and your Task 5 answers appear here. This is exactly what prints/exported as your PDF.
CLO800 Lab 07 - Implement Cloud Data Protection
Name: . Account: ·
Professor: Dr. Kazemi